Category Archives: How To

Make-Your-Own Mountain Pies

Today’s post is not a recipe, but an idea that I’m so excited to share. Fall is the perfect time to have a make-your-own mountain pie get-together!

To start, for those who don’t know what mountain pies are, they are basically pressed sandwiches that are made over a fire. I grew up eating mountain pies, but recently realized that there are lots of people who don’t know what they are. All that you need to make them is your favorite sandwich ingredients, a fire and a mountain pie maker – which are inexpensive and easy to come by.

I grew up eating super traditional mountain pies – it was either pizza (tomato sauce, cheese, pepperoni) or dessert (canned pie filling). Not that there’s anything wrong with those traditional combos, but a couple of years ago, we started having ‘gourmet’ mountain pie parties at my parents house, and my mountain pie experience will never be the same. Instead of sticking to those traditional ingredients, my mom and I prepared a ton of different ingredients, then laid everything out so that it was a make-your-own mountain pie bar. We’ve had these get-togethers several times over the last few years, and although it can be a lot of work (especially for a big group of people), it is always so fun and so delicious. I thought I’d share the idea today, as well as some ingredient ideas and some of our favorite ‘gourmet’ mountain pie combinations!

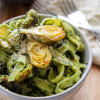
The key to a make-your-own mountain pie bar is to have a wide variety of ingredients in a few categories of foods – you need a variety of meats, vegetables, cheeses, sauces/condiments and ‘extras.’ It’s nice to have all of the ingredients prepped and in small bowls/containers and then laid out on a table next to the fire. It can take some time and can be a bit of work, but if you set aside enough time, it can be a lot of fun to get everything ready. One other note – the type of bread that you use does make a difference. Use a high quality bread of your choice for the best results. The last time Greg and I made mountain pies, we used homemade sourdough from a local bakery (Gettysburg Baking Company!), and it was amazing.

Here are some mountain pie ingredient ideas:

Meats: pulled chicken or pork, ground beef, bacon, smoked salmon, ham
Vegetables: onions (raw or caramelized), peppers, tomatoes, mushrooms, broccoli, spinach
Fruits: peaches, apples, berries, bananas
Cheese: cheddar, swiss, provolone, goat cheese, mozzarella, feta, cream cheese, gouda, parmesan
Sauces/condiments: mustard, pesto, barbecue sauce, hot sauce, tomato sauce, peanut butter, salad dressings, salsa
Extras: capers, olives, banana peppers, artichokes, saurkraut, fresh herbs (basil, thyme, rosemary), chocolate, marshmallows, nuts (like pecans, walnuts, peanuts), brown sugar, fruit jam, lemon curd

And some combination ideas:

Savory:
Bacon, peach, goat cheese (herbs would be good on this too)
Tomato, caramelized onion, olive, caper, mozzarella
Chicken, caramelized onion, saurkraut and cheddar
Chicken, banana peppers, cream cheese, cheddar cheese, hot sauce
Ground beef, mushrooms, banana peppers, tomato sauce, mozzarella, parmesan
Chicken, mushroom, pesto, gouda
Ham, broccoli, mustard, gouda
Smoked salmon, tomato, capers, cream cheese
Pulled pork, onions, peppers, barbecue sauce, provolone
Ham, apple, mustard, cheddar
Chicken, salsa, cheddar
Spinach, caramelized onion, artichoke, parmesan, feta

Sweet:
Cream cheese, berries, brown sugar
Banana, peanut butter, chocolate
Marshmallow, chocolate, banana, peanuts
Cream cheese, peaches, pecans, brown sugar
Cream cheese, lemon curd
Peanut butter, jam, peanuts

So, that’s it! The mountain pie filling ideas are endless, so pick your favorite foods and try it out. Honestly, the craziest combinations are usually the tastiest mountain pies! Another key when you have a big group of people is to have the bread pre-buttered. That way, each person can just grab their bread, place it buttered side down in the mountain pie maker, top it as they please and then put it in the fire until pressed and toasted.

This post has me craving another make-your-own mountain pie night! If you have any awesome mountain pie combination ideas, or any questions about the process, let me know in the comments below!

Late Winter Pasta: Homemade Noodles with Crispy Canned Artichokes and Lemon Parsley Pesto

Remember when I shared with you my late summer pasta, homemade noodles with tomatoes + pesto? Today I bring to you my (very) late winter version – homemade noodles with crispy canned artichokes and homemade lemon parsley pesto.

I’ve kept up with the homemade noodle habit. Not for every time we’ve had pasta (not even close) but I’ve done it several times over the past few months and I’m feeling more and more comfortable with the process. I wanted to create a wintertime pasta with homemade noodles to share with you. The idea for the dish came from a craving I’m having for simplicity – I wanted to use few, simple ingredients that would come together to create a powerhouse of flavor. And that is just what came to be.

This pasta is bright, it’s fresh. Taking a bite of this pasta is like taking a bite of sunshine. And who doesn’t love sunshine?

But in case you want a more specific description of what this tastes like (you know, in case you don’t know what sunshine tastes like) it is lemony. And parsley-y. Neither of those ingredients are cooked in this dish so their flavors are strong and bold. If you aren’t the biggest fan of those strong flavors, this pasta may not be for you. But if you are (like me), get ready to be in love. The bold flavors are complemented by the artichokes, that are baked in the oven with just a bit of olive oil and salt, until tender and crispy.

I want to mention that I have tried two different noodle recipes since my first noodle post. While I loved that recipe, I felt the need to try other things. One time, I followed the directions for the noodles exactly as you see in that first post, except that I replaced one cup of the all-purpose flour with whole wheat flour. I wasn’t happy with the outcome. The noodles were edible, but extremely tough. It wasn’t the most pleasant of eating experiences and I wouldn’t do just that again. The second recipe I tried resulted in the noodles that you see pictured today. I followed the ingredients and directions from Garden Betty, as you see here (for the fresh homemade egg pasta). I must admit that I did have some trouble with the dough. It was very stiff and a bit difficult to work with and I actually had quite the tough time kneading it and rolling it out. I was regretful of my decision to try it out, that is, until I tasted the noodles. While I did have a difficult time rolling out the dough, once it was rolled, cut, cooked and in this dish, I must say that the noodles not only tasted great, their texture was amazing. The end result was worth the difficult time and I would definitely try this noodle recipe again, hoping that the challenge I had with the dough was just a one time fluke. For this dish, feel free to use the noodle recipe I describe in the recipe below (form Garden Betty), the recipe from this post, or even non-homemade noodles (it would still be great!). With homemade noodles, for me, this is definitely a weekend, take-your-time dish. With non-homemade noodles this could quickly and easily be a meal made during the week.

When I developed and photographed this recipe, we were still in the dead of winter. It was a yearning for spring. Now, it’s clear that spring really is just around the bend. This is still a winter pasta – not much fresh produce here – but it is bright and fresh, just like good ol’ springtime. Come to us soon, spring.

1-2

4-2

3-2

2-2

6-2

7-2

8-2

10-2

12-2

11-2

Late Winter Pasta: Homemade Noodles with Crispy Canned Artichokes and Lemon Parsley Pesto
Write a review
Print
Ingredients
  1. 2 cans whole artichokes
  2. Parmesan cheese, for topping
For the noodles
  1. 2 cups unbleached all-purpose flour, plus more for kneading, rolling and dusting
  2. 3 eggs
  3. 2 tablespoons olive oil
For the parsley pesto
  1. 1 bunch flat leaf parsley, rinsed and dried
  2. Juice of 1 lemon
  3. 2 large garlic cloves
  4. 2 tablespoons olive oil
  5. 1/2 teaspoon salt
  6. 1/4 teaspoon black pepper
Instructions
  1. Preheat oven to 400*. Drain and thoroughly rinse the canned artichokes. Cut each artichoke in half lengthwise, and lay cut side down on paper towels to dry. You want the artichokes to dry as much as possible before going into the oven. Let the artichokes continue to dry, changing the paper towels once, as you prepare the noodles.
  2. For the noodles, I followed the method from gardenbetty.com, linked in the post above. I will describe what I did, but before making the noodles, I recommend studying the original post at gardenbetty.com.
  3. In a large mixing bowl, measure two cups of all-purpose flour. Make a well in the center of the flour, crack three eggs and measure two tablespoons of olive oil into the well. Gently whisk the eggs and olive oil, incorporating a little flour into the well at a time, and continue whisking until the dough starts to come together. Dump the rough dough and any remaining flour in the bowl onto a clean, lightly floured surface and begin kneading the dough. Knead for about 10 minutes, or until dough is no longer sticky and the surface is smooth. Cover the dough with a towel and let rest on the counter for 30 minutes.
  4. While the dough is resting, arrange the artichokes, cut side up on a parchment lined baking sheet. Drizzle lightly with olive oil and a pinch of salt. Roast in the oven for 45 minutes, or until browned and slightly crispy. When the artichokes are done roasting, turn the oven off, but keep them in the oven until you are ready to add them to the finished pasta.
  5. To make the parsley pesto, in a food processor, combine the parsley, lemon juice, garlic cloves, olive oil, salt and pepper. Process for about 30 seconds, or until smooth. Set aside.
  6. Before you roll out the noodles, put a large pot of salted water on to boil.
  7. To roll out the noodles, cut the dough into quarters. On a well floured surface, using a rolling pin, roll out one segment of the dough at a time, as thin as you can get it. Mine took a lot of work but eventually got very thin. Once rolled out, sprinkle each side of the dough with flour. Fold the dough once in half and using a sharp knife, cut thin strips, to form the noodles. Once cut, unfold the noodles, gather together and sprinkle with flour to prevent sticking. Bunch the noodles, set aside and continue with the other segments of dough.
  8. Once all noodles are cut, place the noodles in the salted, boiling water. After the noodles are added and the water returns to a boil, boil for 3-5 minutes, or until noodles are soft and tender. Taste one after three minutes to check if it is done. Cooking time will vary depending on the thickness of your noodle.
  9. When noodles are done cooking, drain well and set aside. Return the pot to the stove and add the parsley pesto followed by the noodles, then toss well to combine. Add the artichokes and toss once again.
  10. Serve pasta and top with freshly grated Parmesan cheese.
  11. Enjoy!
Notes
  1. The amount of noodles made provided us with about 4 meals. We each had a serving for dinner and then lunch the next day.
  2. This would also be great with non-homemade noodles. Simply follow the instructions for roasting the artichokes and making the parsley pesto. Cook the packaged noodles according to the instructions on the box, then toss everything together.
The Dreaming Foodie https://www.thedreamingfoodie.com/

Freezing Peaches

Today, more on cherishing the end of summer.

I couldn’t have been happier to see peaches still at market last Sunday – a variety of them appropriately named “Encore,” and of course thanks to the best – Three Springs. After missing market for three weeks for various reasons, I was worried I had missed that last call for peaches, but gratefully I was able to snatch a bag-full of the last ones.

While I think that there is not much better than eating a sliced, fresh peach, I’ve recently gotten into freezing the juicy summer stone fruit. Greg and I drink smoothies most mornings and because of that, frozen fruit is an always on-hand item in our freezer. Naturally, having a freezer full of Three Springs peaches makes me happier than having a freezer full of generic grocery store fruit, so freezing peaches it was! It does require a tiny bit more work than buying grocery store fruit, but not too much work, I promise! (It’s worth the effort!)

I don’t know why freezing peaches seemed like such a mystery to me for such a long time. I’ve done much reading, research and experimentation over the summer and today I’m going to share with you what I’ve found. What works for me, and what is the simplest process out there. There is no peeling, blanching or measuring in the process that I use. It’s a simple as just washing, slicing and freezing! So as simple as this post sounds (how hard is it to freeze peaches?), I thought it’d be worth sharing in case there is anyone out there like me. And even though this is the first week of fall, I have a feeling that I am not the only one with a fridge full of summer to preserve.

{Keep in mind – I’m freezing peaches mainly for making smoothies. Maybe I’ll use them for a dessert or for muffin making at some point during the winter, but my main use will be for smoothies. If your main use for them would be much different than for smoothies, I would suggest doing further research for your specific desires.}

1-2

2-2

4-2

8-2

7-2

Freezing Peaches
Write a review
Print
Ingredients
  1. Fresh peaches
  2. Baking sheet(s)
  3. Parchment paper
  4. Sharp knife
  5. Cutting board
  6. Gallon freezer bags
Instructions
  1. Start with fresh, preferably local peaches. Wash the peaches thoroughly. I just use good old fashioned water to wash my fruit! Let peaches dry.
  2. Prepare your peach freezing station. Line a baking sheet (or several baking sheets, depending on how many peaches you are freezing) with parchment paper. Plan for about 4 peaches per baking sheet, of course depending on the size of your peaches and baking sheets. Slice the peaches. I leave the skins on. I don't mind the slight texture the peach skins add to my smoothies.
  3. Evenly arrange peach slices on baking sheet(s). It is important that the slices are not touching. Line them up with a bit of room between each slice.
  4. Once baking sheet(s) are full, place in freezer for up to 24 hours, or until peaches are frozen. I usually leave the baking sheets in the freezer for a full 24 hours.
  5. After 24 hours, remove baking sheets from freezer and let peaches sit at room temperature for 5 minutes. This will make peaches slightly easier to work with. Transfer peaches from baking sheets to gallon-sized freezer bags. I usually do one baking sheet per bag.
  6. Seal bag tightly, with as little air left in the bag as possible and place in freezer!
  7. Once the bag is empty, I wash it out, let it dry and reuse it for my next batch!
The Dreaming Foodie https://www.thedreamingfoodie.com/

Late Summer Pasta: Homemade Noodles with Pesto + Tomatoes

I can feel the end of summer. I can sense the change in many aspects of my life. In the types of clothes that I’m starting to reach for. In the foods that I am craving. In the air that blows through our open windows. Summer is ending, but it’s not gone just quite yet, and I plan to cherish my favorite things about it – especially the food – for as long as I can.

This pasta dish is definitely a testament to that. The tomatoes – a symbol of the part of me that is still holding onto summer, and the homemade noodles – showing that the first signs of fall have me slowing down, desiring long days in the kitchen, with cool air coming through  windows and a glass of wine (not beer, like summer) by my side.

This was my first time making homemade noodles because I’ve been intimidated by it for a long time. I don’t have a pasta roller and I just didn’t think that a rolling pin could roll homemade pasta dough thin enough. Recently though, something in me told me just to go for it and I’m awfully glad that I did. Just like my success with homemade gnocchi, these noodles were a pleasant experience. I plan on doing this regularly now, especially through the winter months.

So since I am just a beginner noodle maker, let me show you the resources I used: The Pioneer WomanThe Kitchn and Better Homes and Gardens. Thank you to those wonderful sites for giving me the knowledge and wisdom to smoothly get through my first noodle making experience. My advice, from one beginner to another is this: just to do it. Give it a go. Enjoy the slowness + comfort this season has to offer and make some noodles! I do understand though, that for most people, who are busy on the regular, this is a Saturday or Sunday type of meal. Not a weekday meal, and that’s okay. Save it for a special day. Make homemade noodles, dress them simply and enjoy every bite of your hard work.

We were lucky enough to get a bunch of tomatoes recently from Greg’s vacationing coworker’s CSA share and from Greg’s mom and stepdad. So, for this particular batch of noodles, I simply tossed them with pesto and roasted cherry tomatoes. A meal just right for this time of the year. Consider making it even without the homemade noodles. 

Even if you don’t have the time and/or desire to make homemade noodles at this time, I encourage you to enjoy what is now. Enjoy the last of what summer has to offer and if you’re like me, embrace the “slowing down” feeling that comes with fall. I’m enjoying it thoroughly and this dish represents that perfectly.

Below the photos, I typed out just what I did. I also suggest in the recipe section that if you do decide to make noodles for the first time, to read through what I have as well as look at my photos, but to also study the sites that I linked to above. Be prepared as possible and enjoy the process! Leave any questions in the comment section. Enjoy!

7-2

8-2

9-2

15-2

11-2

10-2

1-2

3-2

5-2

6-2

Late Summer Pasta: Homemade Noodles with Pesto + Tomatoes
Write a review
Print
Ingredients
  1. 3 cups unbleached, all-purpose flour, plus more for rolling the dough
  2. 6 eggs
  3. 1-2 pints cherry or grape tomatoes
  4. 1 cup of your favorite pesto
  5. Olive oil
  6. Salt and pepper
  7. Parmesan cheese
Instructions
  1. For the noodles, I followed methods from the Pioneer Woman, The Kitchn and Better Homes and Gardens, all linked above. I will describe what I did, but before making the noodles, I recommend also studying the pages I linked to above.
  2. For the noodles: Into a large mixing bowl, measure three cups of all-purpose flour. Make a well in the center of the flour and crack six eggs into the well. Using a whisk, gently whisk the eggs, incorporating a little flour into the well at a time, and continue whisking until the dough starts coming together. Dump the dough and any remaining flour in the bowl onto a clean, floured surface and begin kneading the dough. Knead for about 10 minutes, or until dough is no longer sticky and the surface is smooth (The Pioneer Woman post shows a good photo of this). Using a large, sharp knife, cut the dough into four equal parts. Gently knead each part for several minutes, just to be sure the dough has been kneaded thoroughly. Let the dough rest on the counter for 30 minutes.
  3. While dough is resting: Place tomatoes on a parchment lined baking sheet. Drizzle with a small amount of olive oil and lightly sprinkle with salt and pepper. Roast in preheated 400-degree oven for about 10 minutes, or until slightly blistered. Turn the oven off, tomatoes can remain in there until noodles are done.
  4. While you roll out your noodles, begin to bring a large pot of salted water to a boil.
  5. After 30 minutes, roll your dough. Using a rolling pin, on a well floured surface, roll out one segment of the dough at a time, as thin as you can get it. Mine was extremely thin but also very pliable. Once rolled out, sprinkle each side of dough with flour. Gently roll the dough, jelly roll style, and using a knife, cut thin strips (as shown in photo above). Once cut, unroll each strip. You have noodles! Repeat the rolling out, rolling up and slicing with each of the remaining three segments of dough.
  6. To cook noodles, place in salted, boiling water and boil for approximately five minutes. Cooking time will vary depending on the thickness of your noodle, so start checking them after two minutes. Mine took a full five.
  7. To make the pesto + tomato pasta: Add pesto to a large saucepan over medium heat, along with a ladle-full of the noodle cooking water. Add the cooked + drained noodles and toss. Add the roasted cherry tomatoes. Add more noodle cooking water, to thin the sauce, as needed. Top with Parmesan cheese, if desired, and enjoy!
Notes
  1. The amount of noodles made with this recipe lasted Greg and I over 2 meals. We each had a large serving for dinner, the next day for lunch, with leftovers yet.
  2. I didn't make enough noodles to freeze this time, but plan to for next time and will follow the directions on the Better Home and Gardens blog, linked above.
The Dreaming Foodie https://www.thedreamingfoodie.com/
*Noodle recipe/techniques from The Pioneer Woman, The Kitchn and Better Homes and Gardens.

Creamy Vegan Herbed Hemp Dip

How are you? It’s been awhile since I’ve last shared with you, but I’m back today with a recipe that I’m thrilled with. And, today’s recipe – creamy vegan! herbed hemp dip goes perfectly with the everyday oven fries I shared with you two weeks ago!

This dip (or spread) is inspired and heavily adapted from Edible Perspective’s Hemp Seed Dressing recipe. I saw Ashley’s recipe and immediately fell in love. Who knew that blending hemp seeds creates a creamy base perfect for making dressings, dips and spreads! This is it. This will be the base to any creamy dip or dressing I need in the future. Thank you Edible Perspective!

Today’s recipe is my ode to french fries dipped in ranch dressing, a lifelong favorite of mine. I’ve kind of stopped wanting to eat ranch dressing in the last few years though, due to its long and unnatural list of ingredients. I’ve tried my hand at homemade ranch dressing using things like sour cream and mayo, but am always disappointed when I have a ton of those ingredients leftover with no use for them.

While this recipe does not taste like an exact replica of the ranch we’re all used to, it’s a substitute that I’m actually even happier with. It tastes herb-y and delicious, makes a great dip and spread, and it uses real, natural ingredients that I keep on hand. This hemp seed dressing solves all my french fry + ranch problems and is to me, life changing.

It also goes great with fresh veggies, spread on sandwiches or drizzled in wraps!

7-2

3-2

4-2

10-2

5-2

12-2

Creamy Vegan Herbed Hemp Dip
Write a review
Print
For the dip/dressing
  1. 1/3 cup water
  2. Juice from 1 lemon (or lime)
  3. 2 tablespoons olive oil
  4. 1/2 tablespoon pure maple syrup
  5. 1/2 cup hemp seeds
  6. 2 medium garlic cloves
  7. 1/2 teaspoon salt
  8. 3/4 teaspoon black pepper
  9. 1/2 teaspoon onion powder
  10. Small pinch of paprika
  11. Small drizzle Worcestershire (optional)
  12. Handful fresh dill
  13. Handful fresh chives
Instructions
  1. Place all ingredients, except fresh herbs, into a blender. Blend on low speed for ~30 seconds, or until smooth and creamy. Scrape down sides of blender, add fresh herbs* and blend for an additional 30 seconds, or until fully incorporated.
  2. Enjoy as a dip, dressing or spread!
Notes
  1. Recipe inspired and heavily adapted from Edible Perspective's Hemp Seed Dressing (link in post).
  2. *Some people prefer a more subtle herb taste, so start with a small amount of fresh herbs and add more as desired.
The Dreaming Foodie https://www.thedreamingfoodie.com/